Xamarin練習的な 第1弾 二部
前回からの続きを書いて行きます。
モデルの製作ですねー。
TODO:
- + ストップウォッチ機能
- +スタート/ストップボタン
- +スタート機能
- +押したらタイムが進む
- +動いてる時は何も起こらない
- +ストップ機能
- +押したらタイムが止まる
- +止まってる時はリセットする
- +時間表示欄
- +更新して表示する
- +スタート機能
- +スタート/ストップボタン
とりあえず、ストップウォッチが必要かなーと思います。
Interfaceを定義します。
using System;
namespace StopWatchGame.Model
{
    public interface IStopWatch
    {
		string Time { get; }
		void Start();
		void Stop();
    }
}
ではでは、実装をして行かないとですね。
using System;
using System.Timers;

namespace StopWatchGame.Model
{
	public class SecondStopWatch : ObserverUtility.BaseObservable<string>, IStopWatch
	{
		double millSecond;
		Timer timer;
		public SecondStopWatch(int intervalMSEC){
			millSecond = 0;
			timer = new Timer(intervalMSEC);
			timer.Elapsed += Timer_Elapsed;
		}

		public string Time => millSecond.ToString();

		public void Start()
		{
			timer.Start();
		}

		public void Stop()
		{
			timer.Stop();
		}

		void Timer_Elapsed(object sender, ElapsedEventArgs e)
		{
			millSecond += timer.Interval;
			NotifyChanged(Time);
		}
	}
}
今回は、System.Timersを使用してインターバル毎に時間を足して行き、それをObserverパターンで変更通知をだします。
では、ViewModelの方に戻ります。
ViewModelがStopWatchを使用します。
using System;
using System.Windows.Input;
using Xamarin.Forms;

namespace StopWatchGame.ViewModel
{
	public class StopWatchViewModel : MVVMUtility.BindableBase, IObserver<string>,  IStopWatchPageViewModel
    {
		Model.SecondStopWatch stopWatch;
        public StopWatchViewModel()
        {
			timeText = "00:00";
			stopWatch = new Model.SecondStopWatch(10);
			stopWatch.Subscribe(this);
			StartButtonCommand = new Command(() => stopWatch.Start());
                        StopButtonCommand = new Command(() => stopWatch.Stop());
        }

		public string TimeText { get => timeText; set => SetProperty(ref timeText, value); }
		public ICommand StartButtonCommand { get; private set; }
		public ICommand StopButtonCommand { get; private set; }

		string timeText;

        public void OnNext(string value)
        {
            TimeText = stopWatch.Time;
        }

		public void OnCompleted()
		{
			throw new NotImplementedException();
		}

		public void OnError(Exception error)
		{
			throw new NotImplementedException();
		}
	}
}
先ず、実際に表示する値をTimeTextに代入して行きます。
これは先ほど言ったObserverでOnNext ()でStopWatchが変更される度に呼び出されます。
あとは、StartButtonCommandとStopButtonCommandにそれぞれ処理を追加しました。
これでとりあえずは、スタート、ストップはできるようになりました。
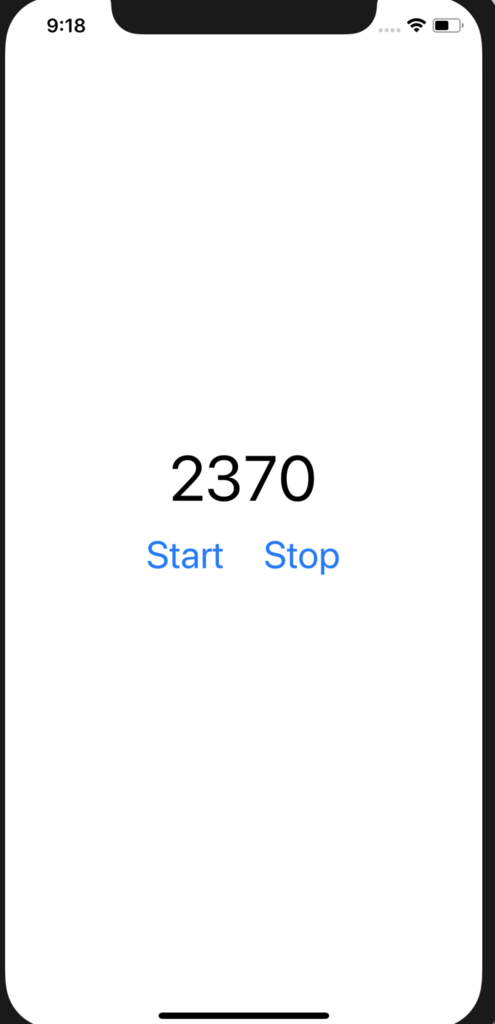
TODO:
- + ストップウォッチ機能
- +スタート/ストップボタン
- +スタート機能
--押したらタイムが進む- +動いてる時は何も起こらない
- +ストップ機能
--押したらタイムが止まる- +止まってる時はリセットする
- +スタート機能
- +スタート/ストップボタン
- +時間表示欄
--更新して表示する- +00.00のフォーマットにする
とりあえず今日は眠いので文字書くのはここまでにします。
思ったより文字書くのに時間かかりますね笑
次はリセット機能と表示のフォーマットですねー。
ぼちぼちやって行きますのでよろしくお願いします。
Xamarin入門的な 第一弾 : ストップウォッチ
初心者の内は質より量ですよねー。
これはスポーツ本気でやってきて思った事です。
という事で、作れるだけ色々作ってみましょうの第一弾です。
よく見るストップウォッチをひとまず作ってみます。
↓今回の完成図です。
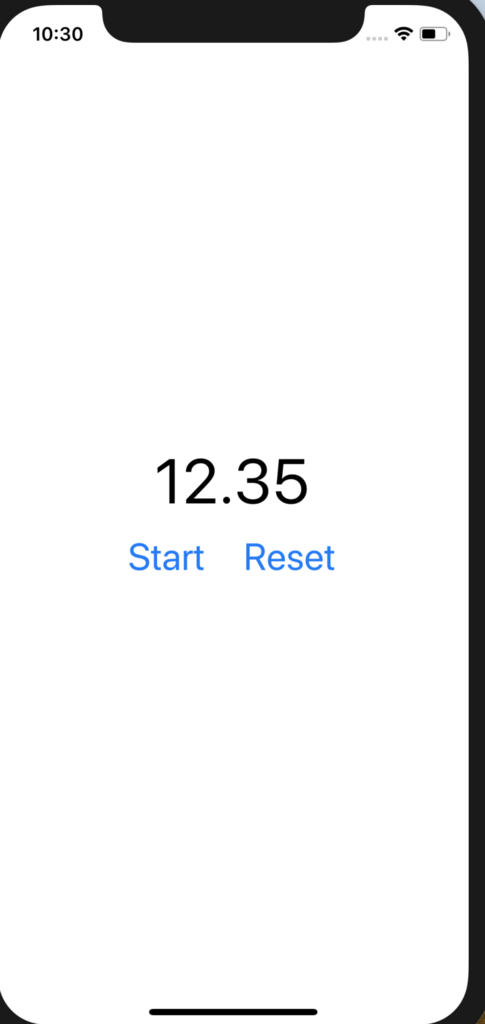
仕様: スタートボタンで開始。
ストップボタンで停止。
動いている間は、Stopと表示、
止まってる間は、Resetと表示
Reset押すと、0になる。
とりあえずTODOリストで進めていきますー。
TODO:
- + ストップウォッチ機能
- +スタート/ストップボタン
- +時間表示欄
って事で画面作成からですね。
Viewに当たる部分です。
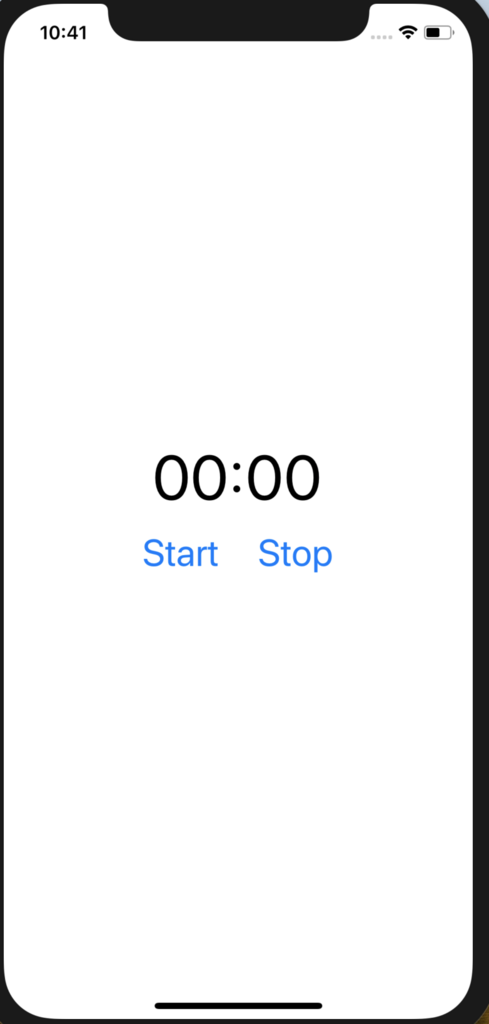
コード通りに書くと画面が作れます。
 <?xml version="1.0" encoding="utf-8"?>
<ContentPage xmlns="http://xamarin.com/schemas/2014/forms" xmlns:x="http://schemas.microsoft.com/winfx/2009/xaml" xmlns:local="clr-namespace:StopWatchGame" x:Class="StopWatchGame.MainPage">
    <StackLayout VerticalOptions="Center">
        <Label Text="00:00" FontSize="50" HorizontalOptions="Center" VerticalOptions="Center"/>
        <StackLayout Orientation="Horizontal" HorizontalOptions="Center" Spacing="30">
            <Button Text="Start" FontSize="30"/>
            <Button Text="Stop" FontSize="30"/>
        </StackLayout>
    </StackLayout>
</ContentPage>
StackLayoutが名前の通り、Layout方法で、順番にコントロールを並べていく感じです。
Orientationに何も指定しなければ、縦に
横にしたければ、Horizontalを指定すればいいです。
コードの例でゆうと、ボタンが横並びになってますねー。
画面ができたので、ボタン押したらーーとか、
いつまでも00:00じゃつらいでーとかなりますよね。
TODO増やします。
TODO:
- + ストップウォッチ機能
- +スタート/ストップボタン
- +スタート機能
- +押したらタイムが進む
- +動いてる時は何も起こらない
- +ストップ機能
- +押したらタイムが止まる
- +止まってる時はリセットする
- +スタート/ストップボタン
- +時間表示欄
- +更新して表示する
先ずは、Viewをいじります。
<ContentPage xmlns="http://xamarin.com/schemas/2014/forms" xmlns:x="http://schemas.microsoft.com/winfx/2009/xaml" xmlns:local="clr-namespace:StopWatchGame" x:Class="StopWatchGame.MainPage">
    <StackLayout VerticalOptions="Center">
        <Label Text="{Binding TimeText}" FontSize="50" HorizontalOptions="Center" VerticalOptions="Center"/>
        <StackLayout Orientation="Horizontal" HorizontalOptions="Center" Spacing="30">
            <Button Text="Start" Command="{Binding StartButtonCommand}" FontSize="30"/>
            <Button Text="Stop" Command="{Binding StopButtonCommand}" FontSize="30"/>
        </StackLayout>
    </StackLayout>
</ContentPage>
はい、何やら増えましたね。
Bindingと書いてるところに注目してください。
かの有名な、バインディング機能を使用します宣言です!!
ViewModelのプロパティーとしてこの名前を作ってあげると、
勝手に見つけに行ってくれます。
ではでは、ViewModelをみていきましょう。
using System;
using System.Windows.Input;
namespace StopWatchGame.ViewModel
{
    public interface IStopWatchPageViewModel : MVVMUtility.BindableBase
    {
		string TimeText { get; set; }
		ICommand StartButtonCommand { get; }
		ICommand StopButtonCommand { get; }
    }
}
このBindableBaseは自分で作ったクラスです。
バインドするためのベースクラスを作っておくと色々と楽なので、適当に使って下さい。
using System.ComponentModel;
using System.Runtime.CompilerServices;

namespace MVVMUtility
{
    public class BindableBase : INotifyPropertyChanged
    {
        protected BindableBase()
        {
        }

        public event PropertyChangedEventHandler PropertyChanged;

        protected virtual void OnPropertyChanged([CallerMemberName] string propertyName = null)
        {
            this.PropertyChanged?.Invoke(this, new PropertyChangedEventArgs(propertyName));
        }

        protected virtual bool SetProperty<T>(ref T field, T value, [CallerMemberName] string propertyName = null)
        {
            if (object.Equals(field, value)) { return false; }

            field = value;
            this.OnPropertyChanged(propertyName);
            return true;
        }
    }
}
ではでは、インターフェースを実装して行きましょう。
namespace StopWatchGame.ViewModel
{
	public class StopWatchViewModel :  IStopWatchPageViewModel
    {
        public StopWatchViewModel()
        {
			TimeText = "01:00";
        }

		public string TimeText { get => timeText; set => SetProperty(ref timeText, value); }
		public ICommand StartButtonCommand { get; private set; }
		public ICommand StopButtonCommand { get; private set; }

		string timeText;
	}
}
これでこのコマンドに処理を入れるとボタンを押したら動いてくれはるし、
TimeTextに値を代入すれば、SetPropertyが値変わったよーアピールしてくれます。
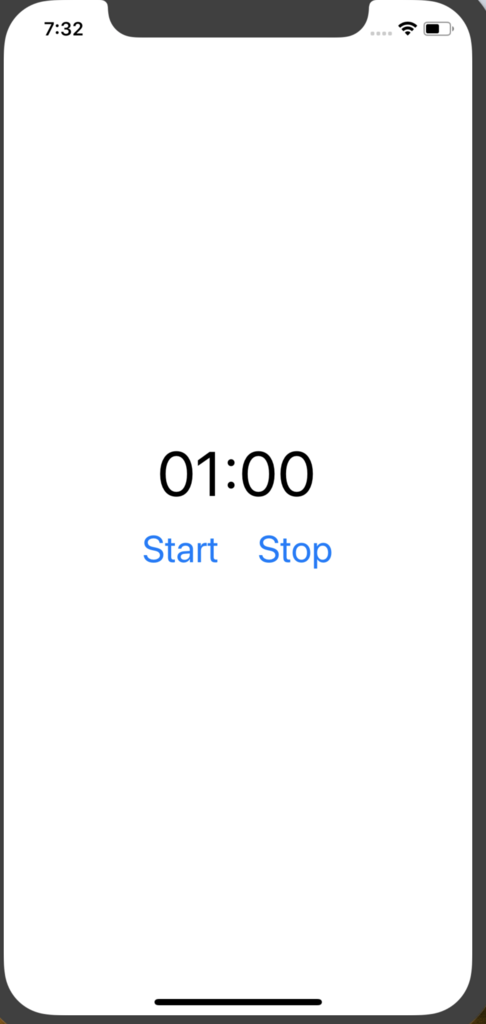
このViewModelをMainPageのBindingContextに設定します。
public partial class App : Application {
        public App()
        {
            InitializeComponent();
			MainPage page = new MainPage();
			page.BindingContext = new ViewModel.StopWatchViewModel();
            MainPage = page;
        }
        ....
    }
すると下記のように反映されます。
とりあえず、今日はここまで物は出来てるけど文字書くの疲れました笑
次回はModelの作成から初めて行きたいと思います
TODO:
- + ストップウォッチ機能
- +スタート/ストップボタン
- +スタート機能
- +押したらタイムが進む
- +動いてる時は何も起こらない
- +ストップ機能
- +押したらタイムが止まる
- +止まってる時はリセットする
- +スタート/ストップボタン
- +時間表示欄
- +更新して表示する
